Randy Charles is the owner of PaintCentric.com, a website dedicated to providing information, tips, tricks, and news about all things paint. With over 10 years...Read more
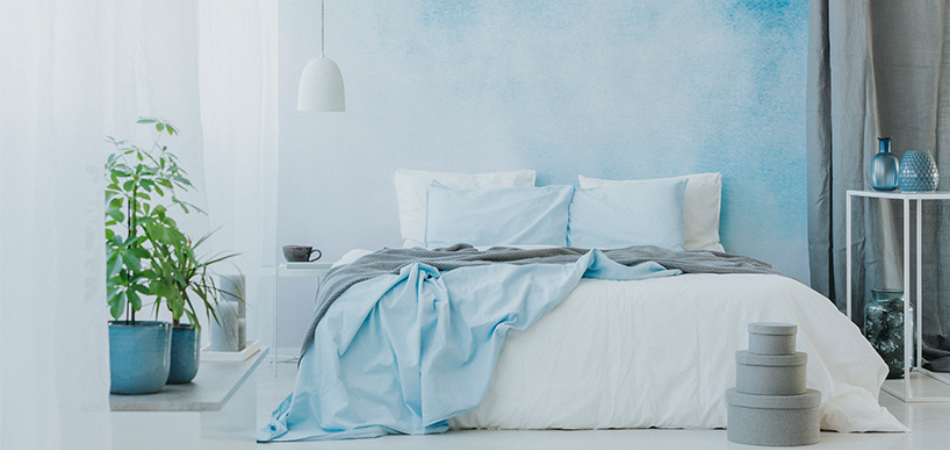
Want a unique, alluring look in your home? Paint ombre walls! But first, you need to prepare the walls. This will make sure the ombre effect looks seamless and amazing when you’re done.

Here’s how to get ready for ombre painting:
Select the paint colors
Creating a beautiful ombre wall requires the right colors and finish. Pick two shades of the same hue, ex. light and dark blue. For an ombre effect, use hues that transition gradually. Use products such as latex, acrylic paint, or water-based glaze. Choose the finish—from matte to glossy. Decide if you want an intense look or subtle tones. Also, decide where to begin the lighter color (top, middle, or bottom).
Before finalizing your color choices, buy samples of each shade.
Choose the right tools
Ombre painting is a stylish way to add a unique touch to your walls. To get the best results, pick the right tools for the job. Gather:
- Paint in varying shades
- Primer or sealer
- Paint roller or brush
- Painter’s tape
- Drop cloth
- Step stool (or ladder if needed)
- Paint tray or bucket for each paint color.
Time to prep! Make sure walls are clean before you start. Use sealer/primer on fresh drywall. Mask up the ceiling and baseboards with painter’s tape, so the ombre effect is higher up on the wall. Get ready to paint!
Prepare the walls
Create your ombre walls! Before you begin, make sure to prepare the surface. Ombre walls look better on flat, even surfaces. Remove any wallpaper or wall coverings.
- Wash the walls with warm soapy water. Rinse it off before it dries. Give the walls time to dry.
- Use medium-to-fine grit sandpaper to sand over texture imperfections like cracks, chips, or uneven edges. This will help give it a smooth finish. Wipe down the wall to get rid of dust and residue.
- Then, apply primer and finally, paint your walls in an ombre effect!
Painting Process
Paint your walls with a trendy ombre look! Ombre walls are all the rage. Add some fun colors and textures to your walls.

Painting ombre walls can be tricky. Make sure you have the right supplies. And know how to apply them correctly. Let’s learn more about painting ombre walls.
Paint the base color
To paint ombre walls, first pick a color. Reference paint swatches or fabric samples to select two or three coordinating shades. Choose a color that’s a bit darker than usual.
- Tape off areas not meant for painting like windows, baseboards, doors and fixtures.
- Cover with drop cloths and plastic.
- Apply two coats of the base color, letting each dry before starting the next coat.
- Use long strokes from one side of the wall to the other.
- Add extra layers until the surface is even.
- Let dry overnight before adding any decorations.
Paint the ombre effect
Time to paint the ombre effect! With a foam roller, apply each color in layers. Make sure each layer does not reach the top of the wall. Step back and check for consistency from different angles.
- Darker colors need to be applied in lightest to darkest order.
- Work in 1-2 foot sections and adjust quickly if needed. Rolling upward at the end helps soften hard edges. This adds depth and structure to the ombre wall.
When using three or more tones, pattern preparation is critical. This avoids abrupt stops or overlapping. Mindful execution should give a beautiful end result!
Add finishing touches
Once you’ve blended in your colors, it’s time for the finishing touches. Wet a cloth and use it to blend all the colors together until they look in harmony. Don’t worry about making shapes; all you need to do is make sure the color transitions are smooth.
With a paintbrush and some white paint, paint small dots around the edges of your wall design. This will tie everything together and give it a bright, sparkling effect. If you want, add extra flair with butterflies or gold/silver flowers for an extra sparkle.
Cleanup
You’ve completed the ombre wall painting! Now, it’s time to clean up. Cleaning should be an important part of this. Nobody wants paint left on the walls and floors.
Here’s how to clean up:
- Take necessary steps to get all paint off.
Remove any excess paint
Once you’ve painted your wall, make sure to remove any leftover paint. Use a damp cloth for this. A cotton swab can also help clean small spots or edges.
If the walls are dirty before painting, you need to clean them. Wipe the walls with a mild soap or detergent and warm water. Rinse them afterwards. Make sure they dry completely before applying the ombre effect.
Clean up any drips or spills
After applying the paint, make sure to clean up any drips or spills. Use a damp cloth or sponge and dab around the walls. This will help avoid smudges or stains and ensure the ombre pattern looks even.
After you are done, wash the tools and equipment. Make sure they’re dry before packing them away.
Clean the tools and the area
Once painting your ombre walls is done, it’s essential to clean both the tools and the area. Start by wiping excess paint off brushes, rollers, and sponges with a damp cloth. Then rinse all tools with warm soapy water and dry them with a towel. Dispose of contaminated items according to local regulations.
To clean the area, begin by vacuuming any loose debris from floors, walls, and ceilings. Next, use a damp cloth soaked in soapy water to wipe any affected surfaces. Let all surfaces dry before replacing furniture or other items.
Final Touches
Ensuring your ombre wall looks perfect? V vital. Do it yourself, or hire a pro? Both options are important. Here’s what you can do to ensure it looks great. Let’s begin!
Techniques to use? Got ’em:
Apply a sealant
Sealant is the final step for your ombre wall finish. Choose the right sealant that fits with the surface finish: glossy, matte or satin. Paint the bottom with roller or brush, and build up the colour gradually so there are no streaks. Apply two coats of sealant to make sure it sticks well. Let each coat dry properly before applying the next one.
After that, relish your new ombre walls!
Add wall decorations
Once you finish your ombre wall, it’s time for the final touches. Choose decorations that accentuate and emphasize the look. Think: artwork or mirrors with an ombre look, or solid color. Mix trendy elements, like geometric shapes or industrial fixtures, with soft, modern items like pillows and plants. This reinforces the design.
Make sure the ceiling and other walls blend with the surrounding decor. Add bold complementary colors, and retro elements for a unique contrast. This helps bring out the true beauty of a two-tone ombre wall – subtly yet stylishly.
Enjoy your new ombre walls!
You’ve painted your walls – now stand back and marvel at your work! You have unique, stunning ombre walls to show off to guests.
Finish up the room with the perfect furniture and décor. Choose a modern, industrial, or eclectic design for the space. Your walls form the backdrop for the whole room, so consider everything carefully.
Ombre walls fit in any room in the house. Kitchens, bathrooms, living rooms, bedrooms, offices – ombre walls bring vibrancy and color wherever they go. Have fun with your new ombre walls!
Frequently Asked Questions
What colors look best for an Ombre wall?
Depending on the effect you want to achieve, colors such as blues, purples, and greens look great for an ombre wall. You can also mix and match colors to create a unique look.
What kind of paint should I use for an ombre wall?
A2: The best kind of paint to use for an ombre wall is high-quality eggshell or satin finish latex paint. This type of paint will give you the best results and will be more durable than other types of paint.
How do I create an ombre effect on my walls?
A3: To create an ombre effect on your walls, start by painting the base color of your choice onto the wall. Then, gradually blend in a lighter or darker shade of the same color to create a gradient effect. You can also use multiple colors to create a more dramatic look.

Randy Charles is the owner of PaintCentric.com, a website dedicated to providing information, tips, tricks, and news about all things paint. With over 10 years of experience in the painting industry, Randy has become an expert in the field and is passionate about helping others learn more about painting. He has written numerous articles on the subject and is committed to providing accurate and up-to-date information to his readers.
- Latest Posts by Randy Charles
-
How Much Do You Tip Painters? The Ultimate Guide
- -
Can You Paint Over Rust Converter?
- -
Can You Paint Inside When It Is Raining?
- All Posts
