Randy Charles is the owner of PaintCentric.com, a website dedicated to providing information, tips, tricks, and news about all things paint. With over 10 years...Read more
Preparation is essential for painting cabinets. If you desire a professional, long-lasting outcome, allocating time to the needed prep is important. This includes cleaning the cabinets before beginning to paint. Let’s look at how to clean cabinets before painting them!

Remove all items from the cabinet.
Before starting, take out all items from the cabinets. Store them in a safe spot away from painting areas. Keep paint and supplies far from kids and animals.
- Vacuum each cabinet and drawer to get rid of dirt and debris.
- Clean all corners, crevices and nooks where dust and residue have built up.
Remove the hardware
Before you start prepping the cabinets for painting, removing all hardware, such as hinges and handles, is crucial. Make sure the surfaces are free of dirt, dust, and grime. Clean each surface with a wet cloth or vacuum it with a brush attachment to remove any particles sticking to it. After cleaning, use sandpaper to lightly sand any rough patches or smoothed edges before priming and painting. This helps the paint flow evenly, giving a smooth finish.
After removing the hardware, cleaning, and sanding, you can prep the cabinets for painting.
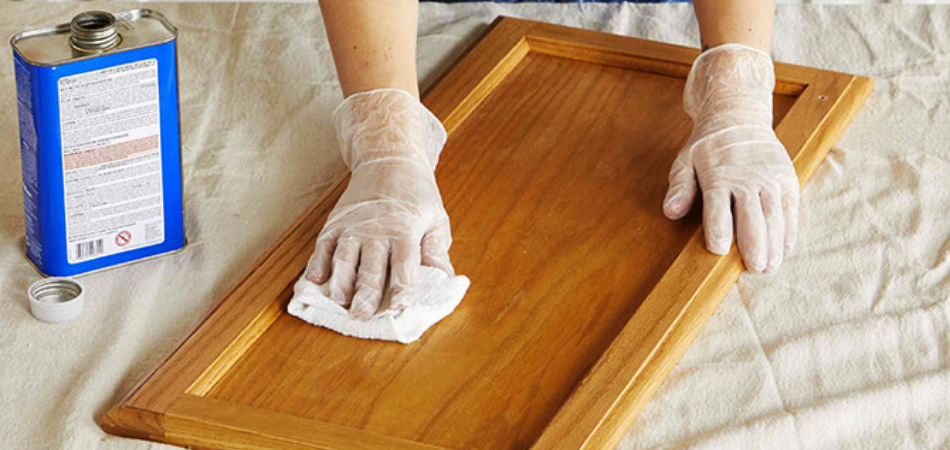
Wipe down the surface with a damp cloth

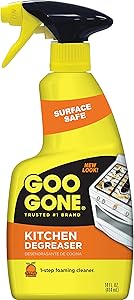
Before you commence painting, prep your cabinets. Wipe the surface with a damp cloth. Check that there’s no dust or debris. If you see any grease spots, use 50% water and 50% vinegar to clean them. Use a degreaser like a dish soap or TSP if your cabinets have built-up grease or grub particles. After the cleaning, let the cabinets dry. Only then can you start the painting!
Cleaning

Cleaning cabinets is a must before painting them. Ensuring a flawless paint job and eliminating debris and contaminants is key. This article will explain different ways to clean a cabinet before painting:
Fill a bucket with warm water and a mild detergent
Fill a big bucket with warm water. Add one cup of mild soap, such as Dawn, Palmolive, or Seventh Generation. Wear rubber gloves for protection. Swish your hand to creating suds.
Get a sponge or rag you don’t mind throwing away. Dip it into the sudsy solution and start wiping down each cabinet door. When done, rinse the rag or sponge in clear, cool water. Make sure there’s no soap left. Wipe off any soapy residue with a clean rag and cool water.
Scrub the surface with a soft brush or sponge.

A thorough cleaning of the cabinets is essential before painting. Use a semi-rugged brush or sponge to scrub the surfaces lightly. Make sure all nooks and crevices are brushed clean. Wipe the area with a soft cloth and remove dust or dirt particles.
Inspect corner seams for any damage or wear. Use a knife to scrape them gently. Finally, inspect the counters for any wear or damage before painting.
Rinse the surface with a damp cloth.
To get pro results with cabinet painting, proper prep is essential. Start by wiping down the doors and drawers with a damp cloth. If needed, use a mild detergent. Let the surfaces air-dry. Then sand them with 150-grit paper.
To remove dust, use a stiff brush or vacuum. Finally, apply primer and paint.
Sanding
Sanding is essential to prep your cabinets for painting. You can do it by hand or with an electric sander. It makes the surface smooth. Then, primer and paint can properly bond and last.
Let’s look at the various ways to sand cabinets before painting:
Sand the surface with a fine-grit sandpaper
Sanding the cabinets with fine-grit sandpaper (100 to 150 grit) is essential before painting. The goal is to make the surface as smooth as possible. Too much pressure can leave scratches, so use light pressure. Start with coarse grit and work up to the finer. Then use a clean cloth or tack cloth to remove dust.
When sanding, wear goggles and an approved dust mask. This will protect the eyes, nose and lungs from harmful particles or dust. Be sure to work in a well-ventilated area. Never paint in a place with poor air circulation.
Wipe away any dust with a damp cloth.
First off, remove all the cabinet doors and drawers. Then, it’s time to start sanding. This will create an even surface for the paint to stick. Use 180-grit sandpaper. Then, get finer, such as 220-300-grit. Don’t be too aggressive! Go in the same direction as the woodgrain. After each sanding session, wipe away dust with a damp cloth or vacuum. Then, use a higher grade of sandpaper or proceed to the next step. Ready to paint!
Priming
Priming is indispensable before you start painting cabinets. It helps the paint stick to the surface, creating a polished, uniform look. Priming also seals the wood grain, thus reducing the paint needed.
To get ready to prime, follow these steps:
Apply a coat of primer to the surface
Before you start painting, you must put on a coat of quality primer. It helps the paint stick to the surface and gives even coverage when dry. Primer also gives a better adhesion for a great finish. Not all paints need primer, but it is still beneficial.
Use a high-quality brush or roller to apply primer. Wear rubber gloves to avoid skin irritation or allergy—Prime the sections of the cabinet doors, drawers and frames. Don’t contaminate other areas with primer before they are ready. Let each area dry before moving on further coats or the next stages. This is ideal for success!
Allow the primer to dry completely.
Once your primer coats the cabinet, let it dry. Depending on primer, humidity, and temperature, it can take 1-4 hours. Check the instructions on the label. To test, gently press a section with your finger or cloth rag. If there is residue, wait until dry. Applying paint too soon will ruin your project.
Painting
Give your kitchen a fresh look without all the problems of a full renovation. Painting cabinets is the answer! But, to achieve the best results, clean and prep them first. Here’s what you need to do:
- Clean and prepare the cabinets correctly before you start painting.
Apply a coat of paint to the surface.
Before applying paint to cabinets, you must prepare the surface. This will create a smooth finish and maximize the paint job’s life. Begin by cleaning the cabinets. Focus on corners and crevices, as they often contain grease or dirt. Then use sandpaper or steel wool to lightly scuff the surface. Wipe with mineral spirits or a vinegar-water mix. This will make the surface primed for primer and paint.
Apply the necessary primer. Then apply a top coat(s). Many projects may require multiple coats. Consult instructions or speak to a professional. Let 24 hours pass between coats. Use painter’s tape to ensure each layer is dry.
- Clean the cabinets.
- Scuff the surface with sandpaper or steel wool.
- Wipe the surface with mineral spirits or a vinegar-water mix.
- Apply the necessary primer.
- Apply top coat(s).
- Let 24 hours pass between coats.
- Use painter’s tape to ensure each layer is dry.
Allow the paint to dry completely.
Time to paint or stain the prepped and primed cabinets! Follow the instructions for the brand of paint you’re using. Usually, two coats are enough; however, wait for each coat to dry based on the manufacturer’s instructions before adding the next one.
If desired, add an extra waterproofing sealant or clear varnish when finished.
Finishing
Cleaning cupboards before painting is important for a smooth, nice look. Here’s what to do:
- Remove dirt and dust.
- Make sure no particles are in the way.
- Finish cleaning up your cupboards.
- Now they are ready to get painted!
Reattach the hardware to the cabinet.
Sand the cabinets and apply a base coat of paint. It’s time to add the hardware. You may need a drill and screws or bolts. Put back the windows and cupboard doors. Don’t over-tighten the screws, as they can cause damage. Make sure the hardware is aligned.
Use glue on hinges with large head screws or decorative bolts for extra security. Use wood glue for best results. If cabinet knobs don’t have set screws, put some wood glue before installing them. This will ensure they stay in place when you open and close cupboard doors or file drawers.
Replace all items in the cabinet.
Refinishing cabinets? Remember to replace all items. This includes hardware such as knobs, pulls and hinges. Inspect all hardware and clean or replace it if needed. When replacing, match up dimensions and mounting style.
Want to change the style of hardware? Purchase these before the project. That way, you won’t have to compare different shapes and sizes during installation.
Frequently Asked Questions
What supplies are needed to clean cabinets before painting?
You will need a mild detergent, warm water, a soft cloth, and a soft-bristle brush or toothbrush.
How do I clean cabinets before painting?
Mix a mild detergent with warm water in a bucket. Dip a soft cloth into the mixture and wipe down the cabinets. Use a soft-bristle brush or toothbrush to scrub away any stubborn dirt or debris. Rinse the cabinets with clean water and let them dry completely before painting.
Should I sand the cabinets before painting?
Yes, it is recommended to sand the surface of the cabinets before painting to help ensure a smooth finish.

Randy Charles is the owner of PaintCentric.com, a website dedicated to providing information, tips, tricks, and news about all things paint. With over 10 years of experience in the painting industry, Randy has become an expert in the field and is passionate about helping others learn more about painting. He has written numerous articles on the subject and is committed to providing accurate and up-to-date information to his readers.
- Latest Posts by Randy Charles
-
How Much Do You Tip Painters? The Ultimate Guide
- -
Can You Paint Over Rust Converter?
- -
Can You Paint Inside When It Is Raining?
- All Posts
